|
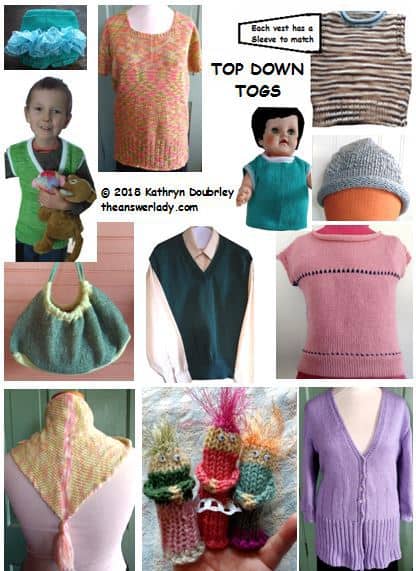
TOP DOWN TOGS is a whole book full of patterns worked from the top down. Here's the table of contents which includes sizing, machine info and gauges. TABLE OF CONTENTS Top Down Thinking an overview & how to convert bottom up patterns to top down ..page 3 Top Down Vest for Tots ...page 4 Finished chest 26, 28, 30 using #4 yarn on bulky, Bond and many mid-gauge machines. Top Down Pullover for Tots .page 10 This adds a sleeve pattern to the vest pattern just above, making a long sleeved pullover in the same style and gauge. Top Down Vest for Adults .page 7 Finished chest sizes: 41, 43, 45, 47, 49, 52 using robust #4 or light #5 yarn. This is for Bulky and Bond machines. Some gauge variations based on keyplate sizes are included. Top Down Pullover for Adults ...page 15 This adds a sleeve pattern to the vest just pattern above making a long sleeved unisex pullover in the same style and gauge. Top Down Vest for Kids to Small Adults ..page 11 Using #3 yarn in the adult pattern from page 7 gives chest sizes from 29.8, 31.3, 32.7, 34.2, 35.6, 37.8. This chapter describes how to use the pattern on a mid-gauge machine and includes a single bed method that does not require reforming of stitches for trimming the neckline and armholes Top Down Pullover for Kids to Small Adults . .page 12 This adds a sleeve pattern to the vest just pattern above making a long sleeved unisex pullover in the same style and gauge. Ten Minute Top Down Topper [hat] . ..page 13 5 sizes and 4 gauges to fit anyone and be made on any machine. Simple Top Down T . ...page 16 9 sizes fit little girls to medium ladies. 5 gauges for any machine. Largest size finishes to bust 42 Small Fairisle Accent shown in the Simple Top Down T . ..page 21 Top Down Baby Shirt page 18 One size for newborn-3 months. 3 gauges so any machine may be used. Top Down Party Pants for Baby Girls . ...page 22 Standard machines only. 3 sizes from newborn to 18 months. All use the same instructions. Size variation is created by changing yarns and stitch size Top Down Tote 3 sizes for Brother and Singer/Studio/Silver Reed standards. .page 23 Kerchief Shawl in several sizes and gauges. Must have fairisle or thread lace capability. This is not technically a top down design. It is worked from center back to tail. But I included it as it seemed in keeping with the theme of approaching the work from a less usual direction . Page 29 Top Down Fingertip Friends . ...page 34 Finger puppets knitted from hair to hem. One pattern using DK yarn and a little Lion Fun Fur works for standard, mid-gauge and bulky machines. Very quick project fun to do with kids. The knitting and decorating is very basic and they can certainly help. Top Down Downtown Cardigan . ..page 36 Bust sizes finish to 39, 42, 45, 48, 51, 54. #4 yarn. Bulky & mid-gauge machines. Ribber optional. Some of the details may be omitted to make a basic cardigan. Top Down Tunic page 41 Finished sizes 39-55 using #3 yarn and a mid-gauge machine. Bulkies can make some sizes |
 Book is $20. your instant download links will be delivered by Ravelry. This works fine whether or not you are a member.  All sales are final. Here's a playlist of videos that will help you with these patterns |
|
TOP DOWN THINKING Most simple styles may be knitted top down if one prefers. There are some advantages to doing so. One is that the ribbing is at the end of the piece rather than the beginning. If hand latching ribbing, many find it easier to do this way. And whether hand latching or using a ribber, controlling the look and stretch of the lower edge of the ribbing can be easier when it is the bind off instead of the cast on. Plus its just fun to know how to turn a project upside down. Another great thing about top down knitting is trading increases for decreases. An example is a long sleeve. If knitted from the wrist up, there will be many increases. Simple increases are nice and fast but sloppy. Full fashioned increases are nice and neat but a little more time consuming and a little more challenging, especially to those with less than perfect vision. If we work the same shape of sleeve from the top down, it will be shaped by means of decreases rather than increases. Full fashioned decreases make a nice neat edge and are a little bit faster and easier than full fashioned increases. Top down knitting also gives more opportunities for knitting pieces right onto each other. For example, if a sweater front and back are already complete, we can seam the shoulder, then hang the armhole on the machine and knit the sleeve right onto it. No hand seaming will be necessary! I have a video called Knitting the Sleeve Right into the Armhole of a Top Down Sweater to help you with this. This may be done even with shaped set in sleeve styles, though of course it is a little more involved than with a dropped or modified dropped shoulder design. Most basic styles such as those in my book: The Answer Ladys Machine Knitting Notebook may be worked either bottom up or top down. Heres how one would take a basic sweater front pattern and knit it top down instead of bottom up. Suppose the instructions read: Cast on 100 stitches. Knit 12 rows of rib. Knit straight to row 100. Bind off 10 stitches at the beginning of the next 2 rows. Knit straight to row 140. Bind off the center 10 stitches. These are the bottom of the neckline. Place the needles on the side away from the carriage in hold. Knitting on the remaining needles, decrease 1 stitch at the neck edge every other row 10 times. Knit a final 6 rows. Bind off the shoulder stitches. We now do a little bit of math. Subtracting the stitches bound off at the armhole tells us that there should be 80 stitches across the top of the sweater just below the neckline. Subtracting those stitches included in the neckline tells us that the top of each shoulder consists of 25 stitches. Each batch of 25 should be at the outer edge of the span of 80. Adding up the rows we discover that the final row is 166, even though the pattern doesnt say so. Since we know that there were 100 rows before the armhole shaping, subtracting 100 from 166 tells us the armhole depth is 66 rows. [finish reading this on page 33] |