 |
 |
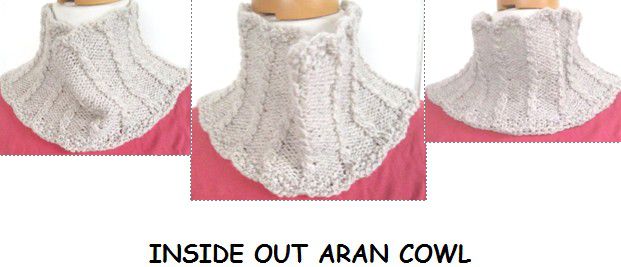 This is an intermediate project. The knitter should be familiar with knitting and purling and able to make a consistent fabric. The cabling is super simple and repetitive which makes this a good first cabling project. Additional instructions for gauges from 3-9 stitches/inch 12-36 stitches/10 cm are included. If you get a gauge of 3[4, 5, 6, 7, 8, 9] stitches per inch in the pattern stitch, you will need 84[108, 132, 162, 186, 216, 240] pegs to knit the design in the round. Add 2 pegs to those numbers to knit it flat.Also included are instructions for knitting the design flat. 400 yards should make the 3-4 stitch/inch versions. Up to 800 may be needed in finer gauges. The cowl is a stylish and fuss-free way to stay warm. $3 as an instant download. Your download will be delivered via the Ravelry system.  this button is for the cowl. The jacket is purchased with the button below left.
|
|
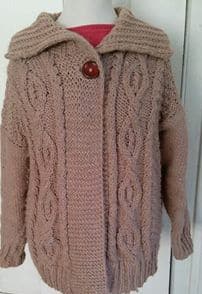
INSIDE OUT ARAN JACKET
YARN, GAUGE, LOOM AND SIZES This pattern was designed specifically with Kiss looms in mind. Others who can match the gauge and have enough pegs should be able to use it but all the testing has been done on Kisses. Use a soft #5 [bulky] yarn that gets a stockinette gauge of 3.5 stitches/4.6 rows per inch or 14 stitches/18.4 rows/4/10cm. [UK knitters, this will probably be chunky yarn to you. Australians, try 12 ply. Europeans try yarns that would be recommended for 6-7mm needles]. Kiss loomers try the regular gauge loom with 4 washers, the small gauge with 6-7. The sample is knitted in Northland Timbers acrylic/alpaca/wool blend. It is available from Herrschners. I tried several yarns and was able to make many work but this one was by far the nicest for looks, feel and drape and it is inexpensive! Finished chest sizes about 37.5, 41, 44.5, 48, 51.5, 54.75, 58.25 [95, 104, 113, 122, 131, 139, 148 cm]. Finished length for all sizes is about 26 [66 cm] as knitted. It may hang a little longer in wear. Armhole depths are 9.5[10, 10.5, 11, 11.5, 12, 12.5] [24, 25, 27, 28, 29, 30, 32 cm] deep. These seem generous and they are, on purpose because the bulky jacket looks very odd with smaller armholes and snug fitting sleeves. Shoulder width when finished will be 16.5[17.7, 18.8, 19.4, 20, 20.5, 21] [42, 45, 48, 49, 51, 52, 53 cm].
|
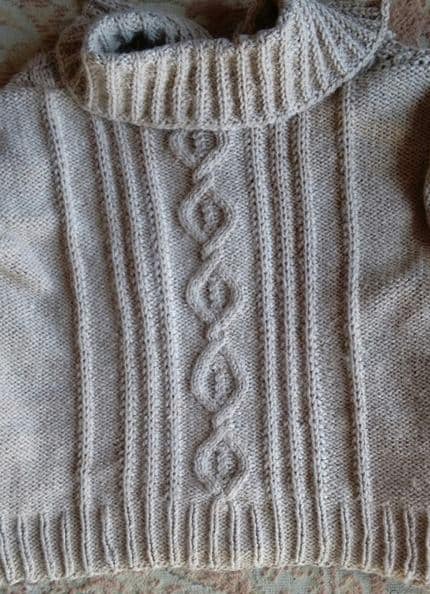
The inside out cable is knitted in such a way that the right side is the purl side of the fabric, in other words, it is the side that comes down on the side of the loom away from the person knitting. This makes it easier to see the cables immediately and to spot any mistakes. It also makes for fewer needed purl stitches which speeds up the knitting for many. All of the cables will be made on purled stitches but, when the fabric is looked at in the completed sweater, they will appear to be normally cabled knit stitches. PEG REQUIREMENTS finished size 37.5, 41, 44.5, 48, 51.5, 54.75, 58.25[95, 104, 113, 122, 131, 139, 148 cm] requirement for largest piece is 67, 73, 79, 85, 91, 97, 103 ADVANCED PROJECT Nothing here is actually very hard to do but there is a lot to keep track of and the project is large so its best to have a couple of simpler sweaters in your success column before advancing to this one. I have lots and lots of support videos on my Answer Lady Knits channel on YouTube and more are added all the time. PATTERN INCLUDES several practice projects to allow you to get comfortable with the stitches. It is 19 pages. $10.99 as an instant download. Your download will be delivered through the Ravelry system. |
Here's a free sample stitch from the jacket pattern to try out. It's free but it's still part of a copyrighted book. You may use it all you like and you may send people here to get it but it is not OK to "share" it around yourself. TUCK RIB This is used on the collar of the sweater and in some columns of stitches up the back. It is not used on the front. The tuck ribs are created as purl stitches but they are only knitted every other row. On a tuck rib column of stitches row 1 contains a wrap as though the stitch were to be knitted but is not knitted over. On row 2, purl the stitch, working through both the true stitch that is on the peg and the extra wrap as though they were 1. In other words, wrap the new yarn below both the stitch and the extra wrap, insert your tool through the original stitch and the wrap from the previous row, grab the newest wrap and pull it up and through to create the new stitch. |