  Your book will be delivered by Ravelry
$20
Your book will be delivered by Ravelry
$20
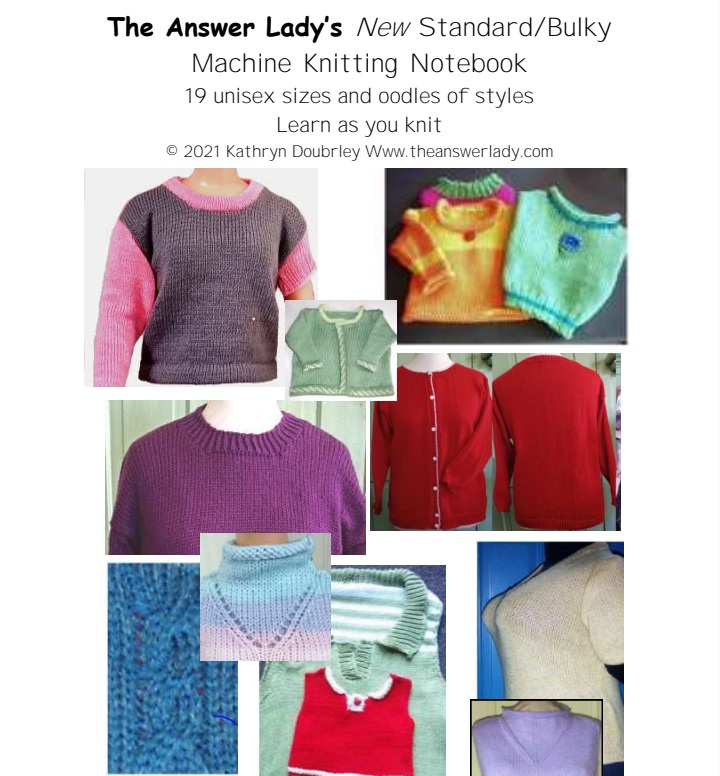
This is a new publication although you may have heard of The Answer Lady's Machine Knitting Notebook before. Here's the story behind the book. It started out as a basic primer for new machine knitters in a single gauge. A few years ago, it recieved a significant upgrade and a second gauge. Now it has received an enormous make-over which includes some clarifying, improved file quality, more patterns, more photos, new chapters, direct links to helpful videos and a new way to print out your fill in the blank patterns easily. With so many changes, this book has a new title:
The Answer Lady's NEW Standard/Bulky Machine Knitting Notebook.
There is also now a second volume, sold separately that is aimed specifically at mid-gauge machines using DK yarn. Those gauges are NOT in this book. What this book does contain is 19 sizes from a finished sweater chest measurements of 18 to a finished chest of 54". These sizes cover newborn to XXL adults. The patterns are unisex. Gauges of 7 stitches/10 rows per inch and 4 stitches/6 rows per inch are included for all patterns meaning that all may be knitted on either standard or bulky machines. The book begins with a very basic dropped shoulder sweater pattern and all the other patterns add skills and refinements, building on that first pattern. The table of contents shows what to expect. All patterns are written with blanks for you to fill in by consulting the charts provided. That's how so many sizes may be included without confusion. All of the instructions are written out in plain English.Abbreviations are used only in the charts and explanatory keys appear on the same page when this was necessary. The book is 88 pages with lots of illustrations.
TABLE OF CONTENTS
Basic dropped shoulder crew neck
Neckband options
Terms & techniques
Basic Hems
Generic Ribber Instructions
Create a cardigan
Fairisle hems and bands
Short sleeves
Modified dropped shoulders
Dare to dart
Keyhole fronts
Sleeveless shells & vests
Neater Shoulders
Perfecting fit
Create a cable
Funnel necks
More about neckbands, cardigan bands, afterthought hems & shoulder opening
Basic [not Boring] Adult Sweater
Adjusting for Perfect Sleeve Length
Passap Notes
Bond & KnitSmart Notes
Helpful videos
Print out pattern sheets with blanks
Free article on making a super-sized Bond machine from 2 or more
|
 $20
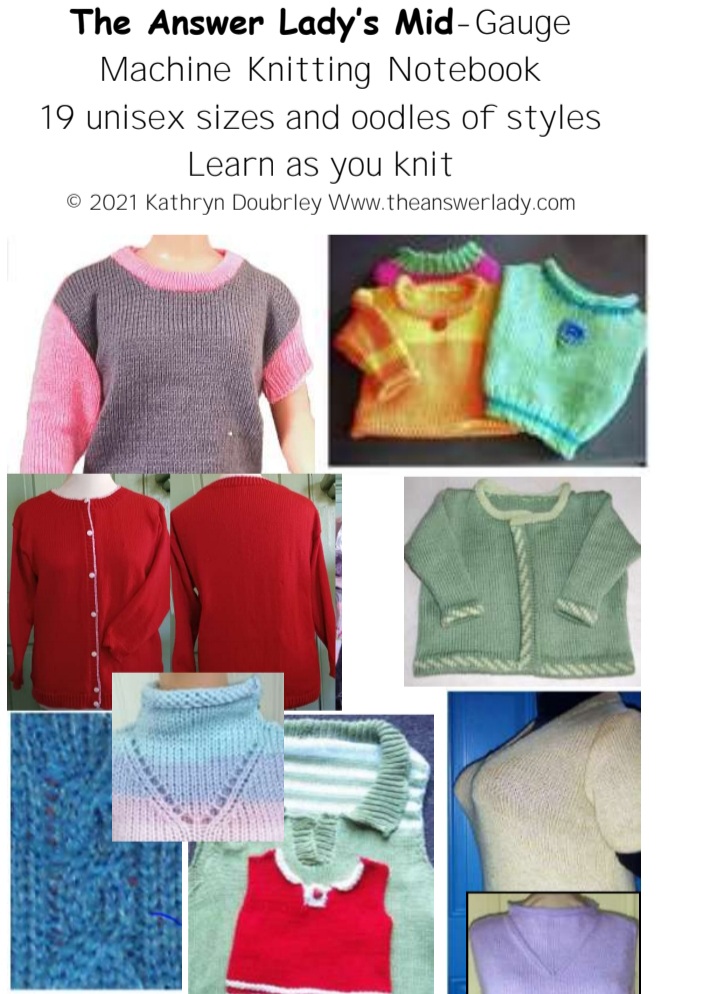
This is a new publication although you may have heard of The Answer Lady's Machine Knitting Notebook before. Here's the story behind the book. It started out as a basic primer for new machine knitters in a single gauge. A few years ago, it recieved a significant upgrade and a second gauge. Now it has received an enormous make-over which includes some clarifying, improved file quality, more patterns, more photos, new chapters, direct links to helpful videos and a new way to print out your fill in the blank patterns easily. the standard/bulky version has recently been upgraded also but this is The Answer Lady's Mid-gauge Machine Knitting Notebook, an entirely separate book. The two books are sold separately. This book is aimed specifically at mid-gauge machines using DK yarn. The patterns are unisex and include 19 sizes from a finished sweater chest measurements of 18 to a finished chest of 54". These sizes cover newborn to XXL adults. The patterns are unisex. Gauges of 5 stitches/7 rows/" and 5.5 stitches/8 rows/" are given. These are the gauges most commonly achieved on mid-gauge machines using DK yarn.
$20
This is a new publication although you may have heard of The Answer Lady's Machine Knitting Notebook before. Here's the story behind the book. It started out as a basic primer for new machine knitters in a single gauge. A few years ago, it recieved a significant upgrade and a second gauge. Now it has received an enormous make-over which includes some clarifying, improved file quality, more patterns, more photos, new chapters, direct links to helpful videos and a new way to print out your fill in the blank patterns easily. the standard/bulky version has recently been upgraded also but this is The Answer Lady's Mid-gauge Machine Knitting Notebook, an entirely separate book. The two books are sold separately. This book is aimed specifically at mid-gauge machines using DK yarn. The patterns are unisex and include 19 sizes from a finished sweater chest measurements of 18 to a finished chest of 54". These sizes cover newborn to XXL adults. The patterns are unisex. Gauges of 5 stitches/7 rows/" and 5.5 stitches/8 rows/" are given. These are the gauges most commonly achieved on mid-gauge machines using DK yarn.
The book begins with a very basic dropped shoulder sweater pattern and all the other patterns add skills and refinements, building on that first pattern. The table of contents shows what to expect. All patterns are written with blanks for you to fill in by consulting the charts provided. That's how so many sizes may be included without confusion. All of the instructions are written out in plain English.Abbreviations are used only in the charts and explanatory keys appear on the same page when this was necessary. The book is 83 pages with lots of illustrations.
TABLE OF CONTENTS
Basic dropped shoulder crew neck
Neckband options
Terms & techniques
Basic Hems
Generic Ribber Instructions
Create a cardigan
Fairisle hems and bands
Short sleeves
Modified dropped shoulders
Dare to dart
Keyhole fronts
Sleeveless shells & vests
Neater Shoulders
Perfecting fit
Create a cable
Funnel necks
More about neckbands, cardigan bands, afterthought hems & shoulder opening
Sporty Cardi for Adults
Adjusting for Perfect Sleeve Length
Passap Notes
Bond & KnitSmart Notes
Helpful videos
Print out pattern sheets with blanks
|